
Guide · Kansas City
Garage Door Weather Seals & Weatherstripping
Drafts, rain, leaves, and mice get in through worn seals. Here's every seal on a garage door, how to tell when it's shot, and how A&E replaces it.
A&E · Kansas City
A garage door's weather seals are the cheapest parts on the whole door — and almost always the first to fail. When the rubber bottom seal cracks or the side weatherstripping pulls away, you get cold drafts, blown-in leaves, rainwater across the floor, higher heating bills, and an open invitation to mice and insects. A&E Emergency Garage Door Repair replaces every seal on a residential or commercial door across the Kansas City metro — bottom seals, threshold seals, side and top weatherstripping, and the seals between sections — so your garage stays dry, draft-free, and sealed against Kansas City's hard winters and wet springs.
The Four Seals That Keep Weather Out
Most garage doors rely on four separate seals. When weather is getting in, one of these is the culprit.
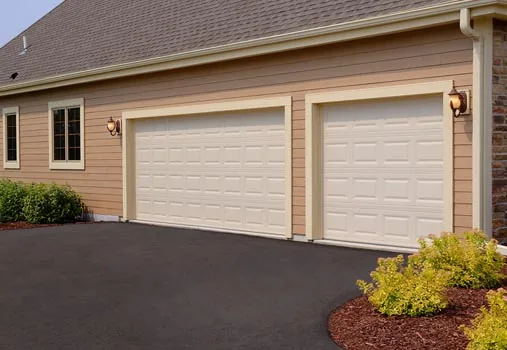
Bottom seal (astragal)
The long rubber or vinyl strip along the bottom of the door. A T-style, P-bulb, or beaded seal slides into a retainer and compresses against the floor. It takes the most abuse and wears out first.
Threshold seal
A rubber strip sealed to the garage floor itself. It pairs with the bottom seal to close gaps when the slab is uneven or sloped, and helps keep out driving rain and snowmelt.
Side & top weatherstripping
Flexible vinyl stop molding nailed to the door jambs and header. It seals the gap between the door and the frame along both sides and across the top.
Between-section seals
On a sectional door, flexible seals between each panel keep wind and water from being forced through the joints as the door flexes and travels.
How to Tell Your Seals Are Shot
The fastest test is the daylight test: with the door closed, stand inside the garage during the day. If you can see daylight under the door or along the sides, then water, drafts, and pests are getting in there too.
Other tell-tale signs: a draft you can feel near the door, water tracking across the floor after a storm, leaves or snow blown into the garage, brittle or cracked rubber that crumbles between your fingers, a bottom seal that's gone flat instead of springy, or — the unwelcome one — mouse droppings near the door. Rodents only need a gap the width of a pencil to get in.
In Kansas City, freeze-thaw cycles are especially hard on bottom seals. Rubber that's pliable in summer turns stiff and splits in a hard freeze, which is exactly when you most want the garage sealed tight.
How A&E Replaces a Worn Bottom Seal
Identify the retainer
We check what style of aluminum retainer is on your door — single-channel, double-channel, or a J-track — because the replacement seal has to match the retainer profile to seat correctly.
Measure and fit the seal
We measure the door width and fit the correct T-style, P-bulb, or beaded seal in the right length, with a little extra to trim clean at the ends.
Remove the old seal
The brittle old seal slides out of the retainer. We clean the channel so the new seal feeds smoothly and seats fully along the whole width.
Install and seat the new seal
We lubricate and feed the new seal through the retainer, then square it up so it sits flat. Where the floor is uneven, we recommend pairing it with an adhesive threshold seal.
Test the close
We cycle the door and check for an even, full-contact seal across the whole opening — no daylight, no gaps — and confirm the opener's down-force still reverses safely on contact.
Rotted or Rusted Bottom Rail? That's a Section, Not Just a Seal
Sometimes the seal isn't the only thing gone. The bottom rail of the door that holds the seal can rust through on a steel door or rot on a wood one, often hidden behind the retainer — and then the seal won't hold no matter how new it is. A&E can replace a single damaged bottom section instead of the whole door in most cases. If your bottom seal keeps pulling loose or the retainer feels soft, call us and we'll take a look.
A Two-Minute Weather-Seal Check You Can Do Yourself
Run through this each spring and fall. It takes two minutes and catches small gaps before they let in water and pests.
- Daylight test: close the door midday and look for light under and around it from inside.
- Squeeze the bottom seal: it should be springy. Flat, hard, or cracked means replace it.
- Check the corners: the bottom corners and the top corners leak first — look closely there.
- Feel for drafts: run your hand along both sides and the top on a windy day.
- Look for water lines: a stain on the floor just inside the door means water is getting under it.
- Scan for pest signs: droppings, nesting material, or chewed seal edges near the bottom corners.
While You're Sealing, Think About Insulation
Sealing the gaps is step one; the door itself is step two. An older single-layer steel or wood door has almost no insulating value, so even with perfect seals an attached or finished garage can run cold. If you're already tired of a freezing garage, an insulated steel door with a polyurethane or polystyrene core holds temperature far better and runs quieter on the tracks.
We can reseal the door you have today and, when you're ready, talk through insulated door options that fit your home — there's no pressure to replace a door that a fresh set of seals will fix. See our door types and materials guide for how the construction layers compare, or call (913) 404-5111 to get your garage sealed up tight across the KC metro, Kansas and Missouri sides.
Good to know
Frequently asked questions
Why is cold air or water getting in under my closed garage door?
Can you replace just the seal, or do I need a whole new door?
How long does garage door weatherstripping last?
Related services & guides
Seasonal Maintenance
A season-by-season garage door maintenance checklist built for Kansas City weather.
Learn moreCommon Problems
A symptom-by-symptom guide to what's wrong with your garage door — and when to call a professional.
Learn moreDoor Types & Materials
A plain-English guide to garage door materials and styles — and how to pick the right one for your home.
Learn more